
People talk about different views on Zoom, but for those of us that aren’t super tech-savvy, that just leaves us asking, “How do I change the view on Zoom?”.
Luckily, it is actually pretty simple to change views on Zoom .
.
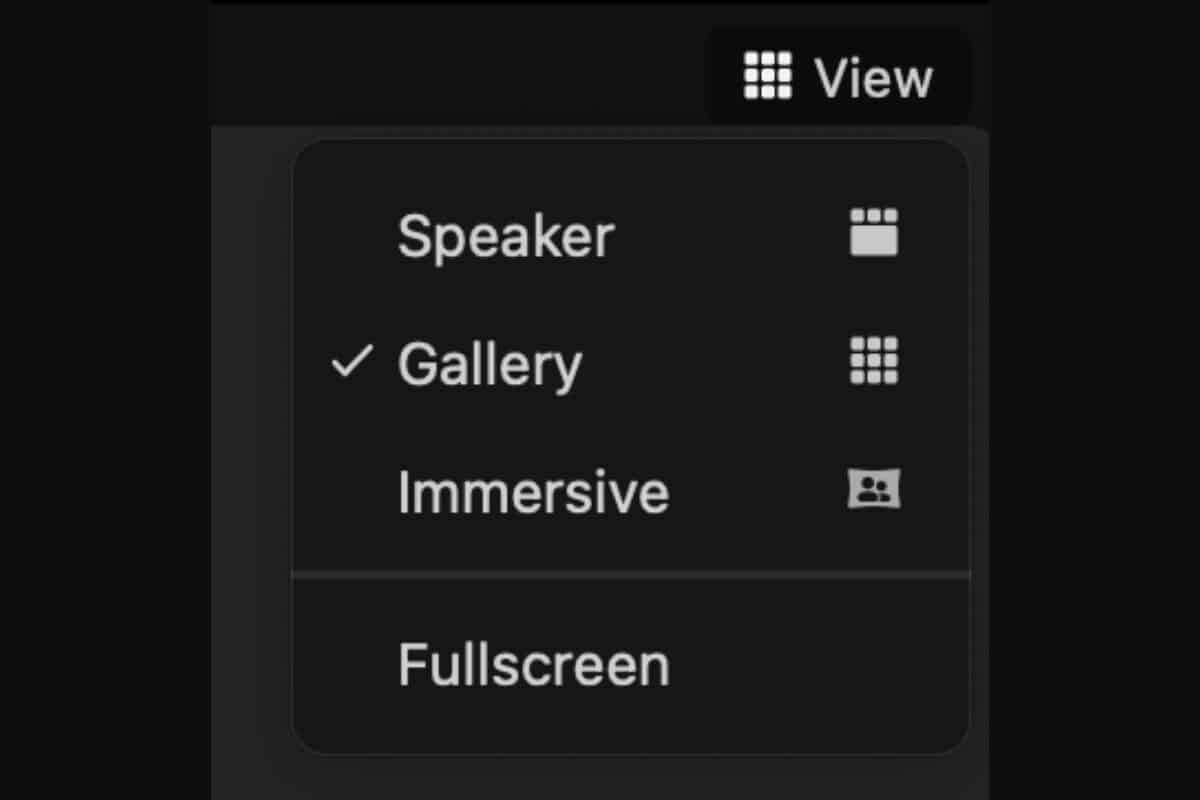
To change views on Zoom, click on the “View” button in the top right-hand corner. Select either Speaker, Gallery, or Immersive. Minimize the Zoom window to get floating thumbnails. To show or hide Self View, click on the More button on the top right of your thumbnail and select “Hide Self View”.
Keep reading for a more in-depth walk-through of each view on Zoom and frequently asked questions.
Want to look your best on Zoom? Good webcam lighting
Speaker View in Zoom
Speaker View shows a large picture of the person that is speaking with floating smaller boxes of some of the other people. You scroll through the floating thumbnails to see the other participants.
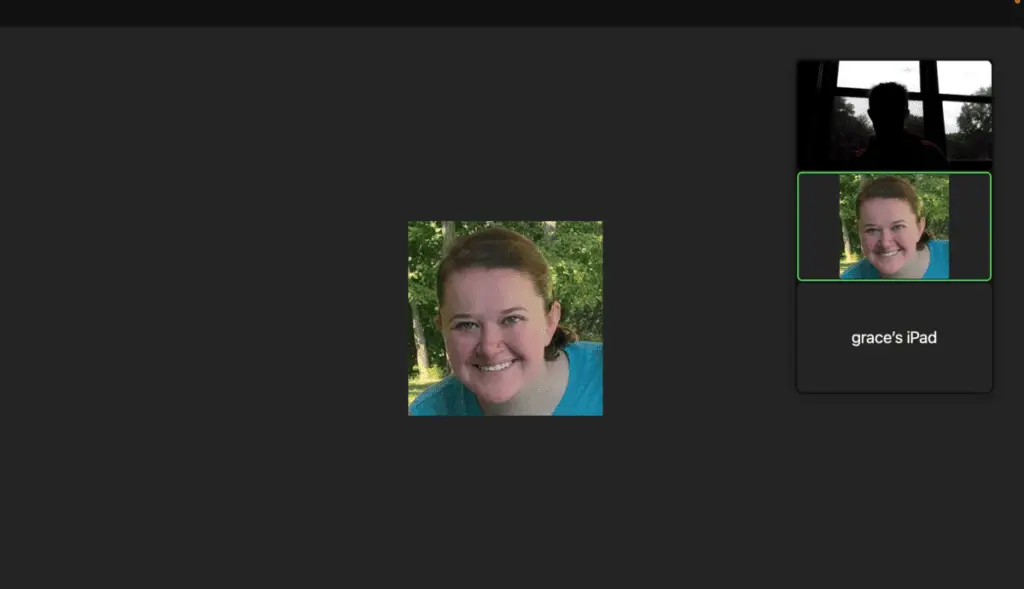
If there are only 2 participants in the meeting, the other participant will always be the large display.
Check out all the benefits of Prime Student
Gallery View in Zoom
Gallery view shows the thumbnails of the participants in a grid. Up to 25 or 49 people appear on a single page; if there are more participants, they will appear on more pages you can scroll through.

The thumbnail of the person speaking will appear on the page you are on and be highlighted to show you who is talking.
Immersive View on Zoom
If you are the host, you can select immersive view, and everyone will see the same “immersive option” that you pick. There are multiple choices to show each person’s thumbnail in another picture, such as in the frames of an art gallery.
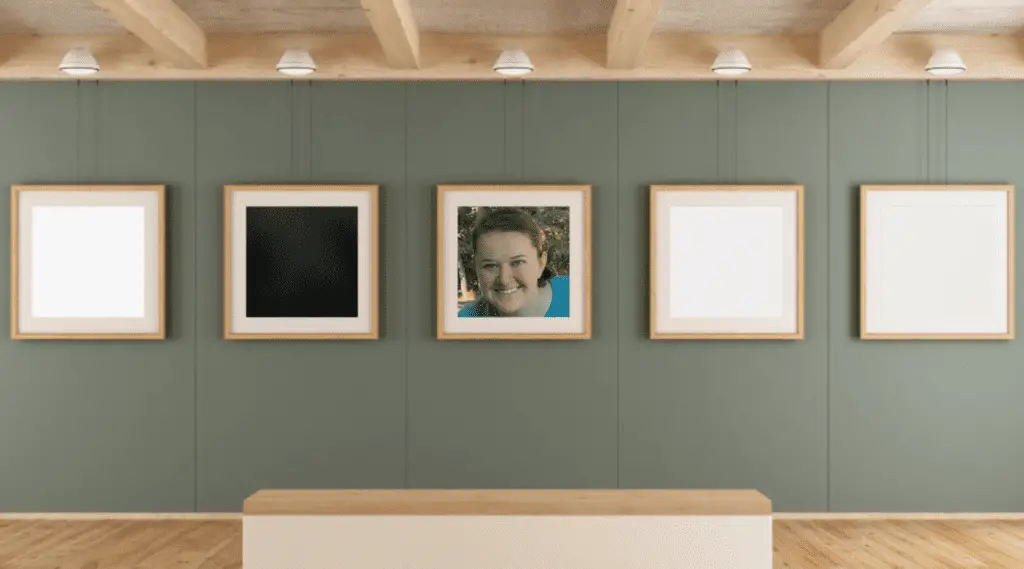
Honestly, this option is really annoying, so I would recommend that you skip this.
Note: If you don’t see this option, it is because it hasn’t been enabled in your settings.
Floating thumbnail window
With the floating thumbnail window, you can minimize the Zoom window but keep the floating thumbnails.
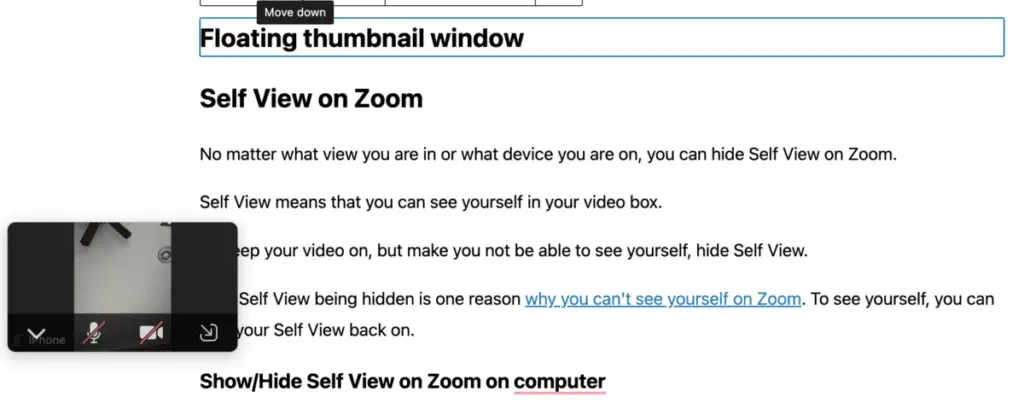
On the window toolbar, you have the option to:
- Click on the arrow to hide/show the window.
- Mute/unmute yourself.
- Start/stop your video.
- Open the normal size Zoom window back up.
You can also drag the window to move it around.
Self View on Zoom
No matter what view you are in or what device you are on, you can hide Self View on Zoom.
Self View means that you can see yourself in your video box.
To keep your video on, but make you unable to see yourself, hide Self View.
Your Self View being hidden is one reason why you can’t see yourself on Zoom. To see yourself, you can turn your Self View back on.
Show/Hide Self View on Zoom on computer
Let’s look at how to hide Self View.
Hide Self View on computer
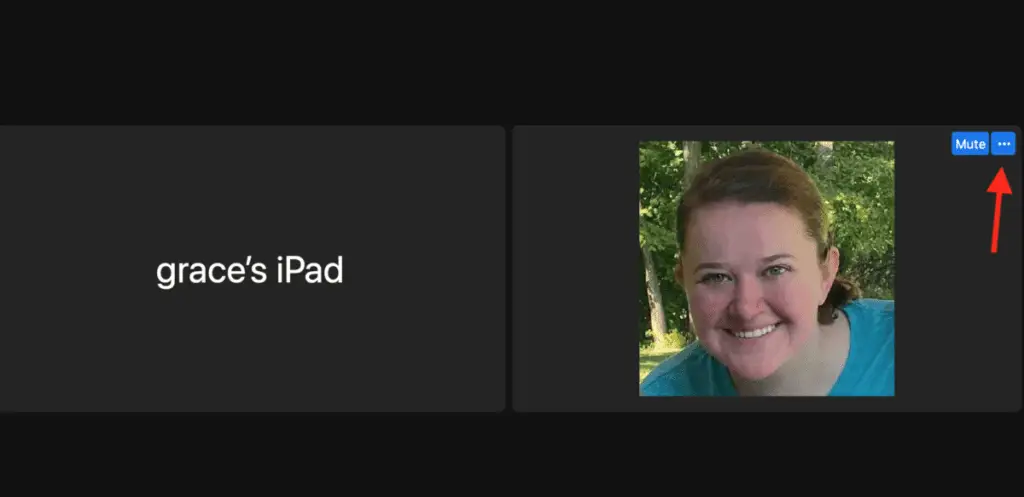
Hover over your video box and then click on the three white dots:
From the dropdown menu, click “Hide Self View”:
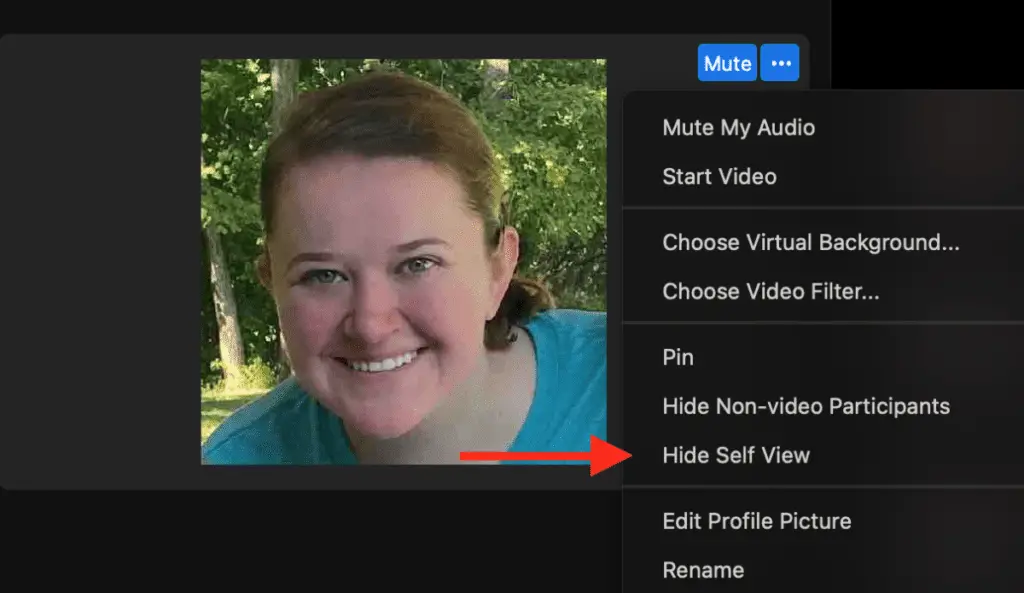
In the picture above, I am in Gallery view, but you can do this in every view by clicking on the three white dots at the top of your video box.
Show Self View on computer
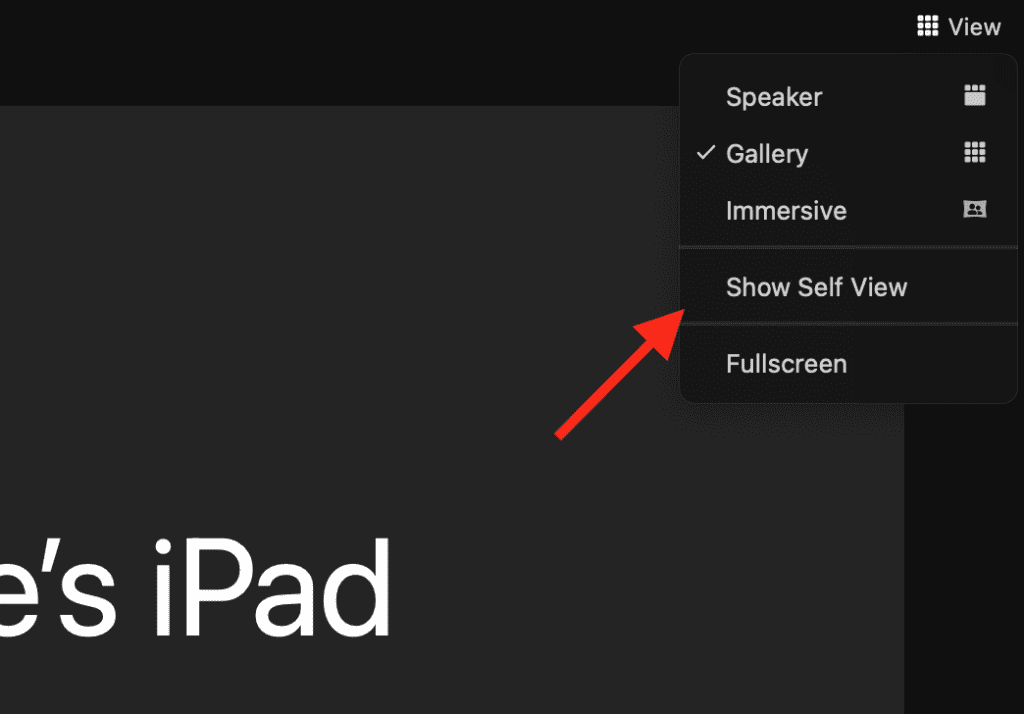
To show your Self View on Zoom on your laptop, click on the View button in the top right-hand corner. From the dropdown list, click “Show Self View”:
Show/Hide Self View on Zoom on tablet
The process of hiding and showing your Self View is slighting different on a tablet.
Hide Self View on tablet
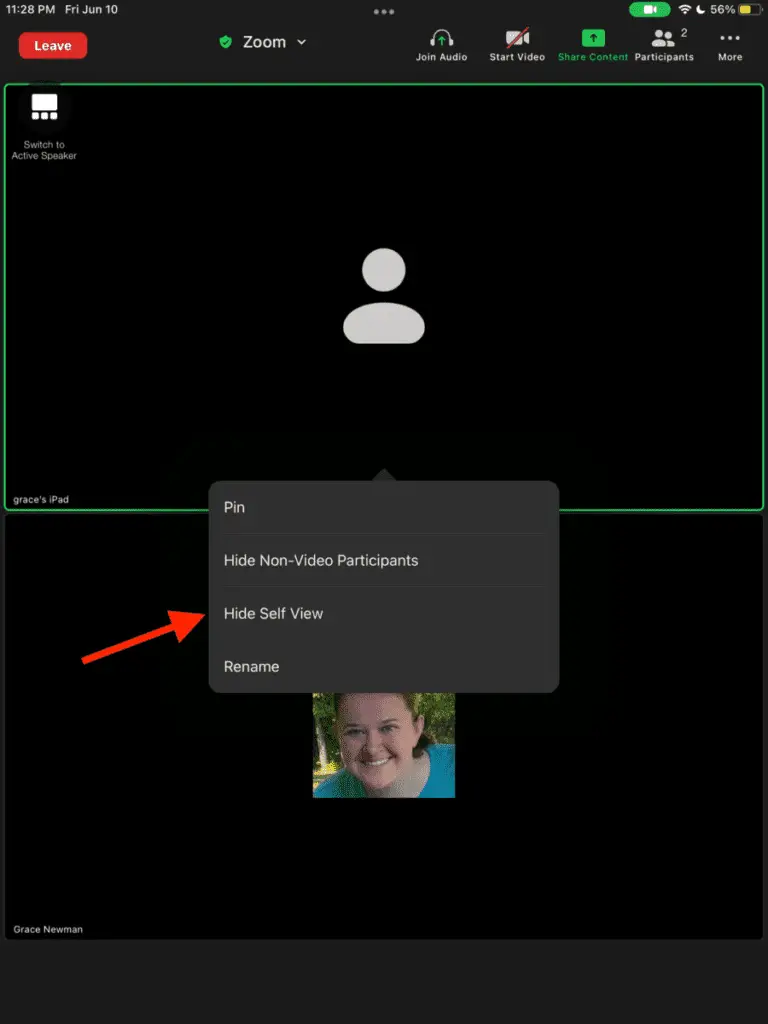
To hide Self View on a tablet, click on your video box and then select “Hide Self View”:
Show Self View on tablet
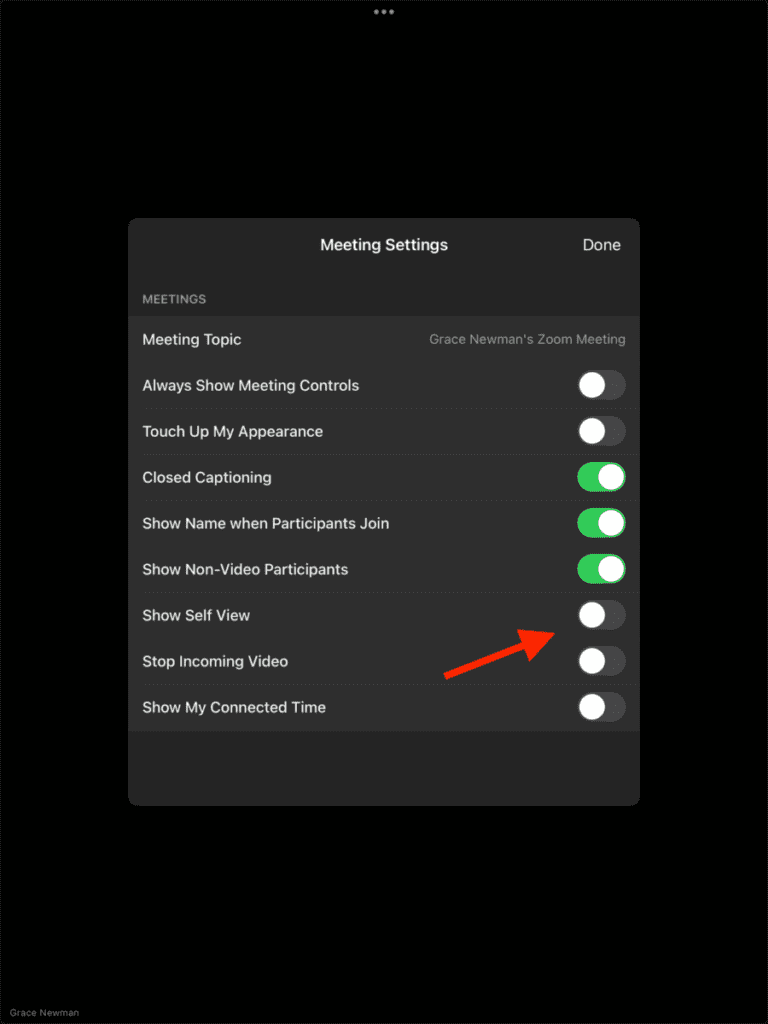
To make Self View visible again, click on the “More” option in the top right-hand corner and select “Meeting Settings” from the dropdown list:

From there, toggle “Show Self View” back on:
Show/Hide Self View on Zoom on phone
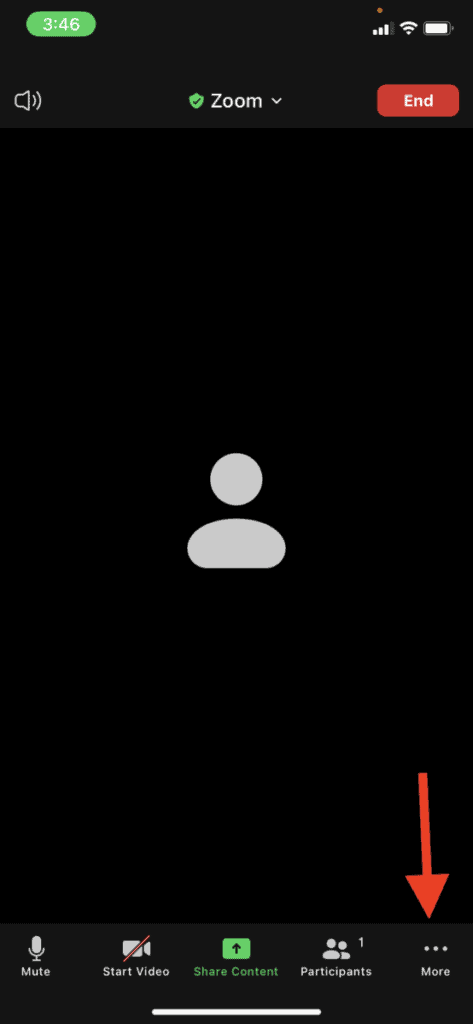
To show and hide Self View on Zoom while on your phone, click on the “More” option in the bottom right-hand corner:
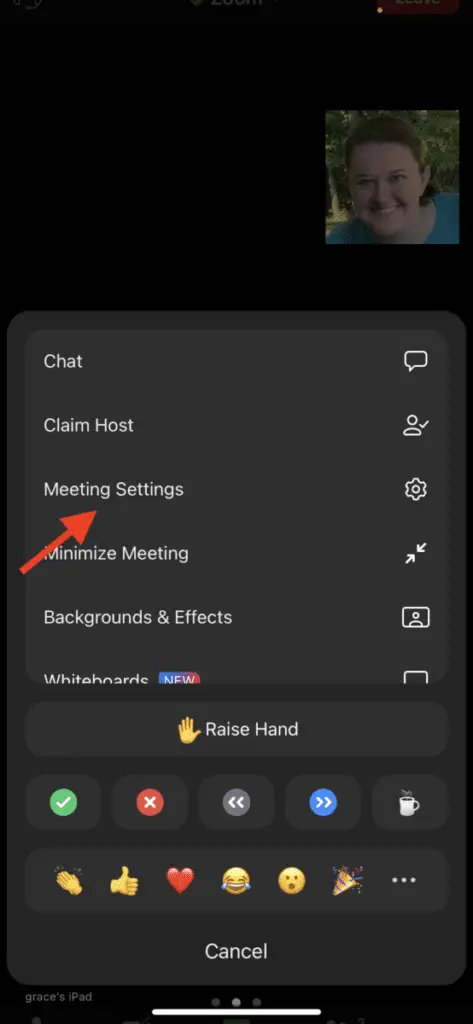
Click on “Meeting Settings”:
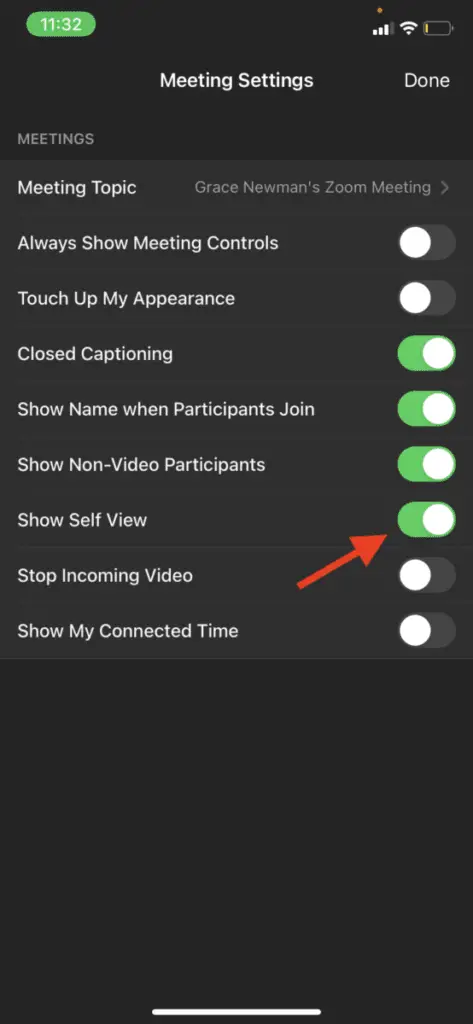
Toggle “Show Self View” on (where it is green) to see yourself or turn it off to hide Self View:
How do you see everyone on Zoom?
To see everyone on Zoom, select Gallery View in the top right corner. If there are 49 people or less in the meeting, you will see everyone displayed on a single page. If there are more than 49 people in the meeting, there will be multiple pages with participants that you can scroll through.
On other devices, you will see fewer people in gallery view with the exact amount depending on the size of your screen, most phones show 4 participants, and iPads can range from 9-25 people. Swipe left to the pages with the other participants.
What do you see when someone is screen sharing?
When someone else is screen sharing, Zoom switches to side-by-side view. The screen share becomes the large display with the thumbnails on the side.

There are 3 side-by-side views:
- Standard: the screen share is the big screen, and the thumbnails are in a row, either horizontal on the top or vertical on the side (like in the picture)
- Side-by-side: Speaker: the screen share is the big screen, and Speaker View (only showing the person speaking) is on the side
- Side-by-side: Gallery: the screen share is the big screen, and Gallery View (showing participants’ thumbnails in a grid) is on the side
Note: If you use side-by-side Speaker or side-by-side Gallery View, you can drag the grey bar (the red arrow is pointing to it in the picture) to make the thumbnails bigger or smaller.
How to see all participants in Zoom while sharing screen
When screen sharing, you will see the floating bar of thumbnails of participants.
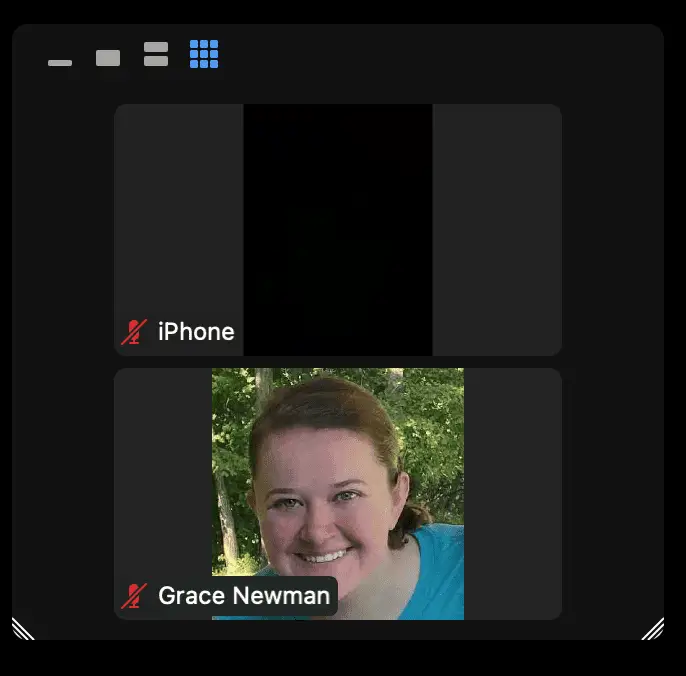
The default will be for the floating sidebar to be vertical, but you can drag it and make it horizontal.
There are four options at the top bar:
- The single horizontal line: To minimize the window
- The rectangle: To show Speaker View (only the person speaking)
- The two thinner rectangles on top of each other: To show the vertical strip of thumbnails
- The grid: To show Gallery View (Gallery View when screen sharing is basically just a slightly bigger vertical strip showing a couple of people and then arrows to move to other pages showing more participants).
I would strongly recommend using the standard vertical strip of thumbnails.
How to hide video panel
If you don’t want to see the participants while you are screen sharing, you can hide the video panel.
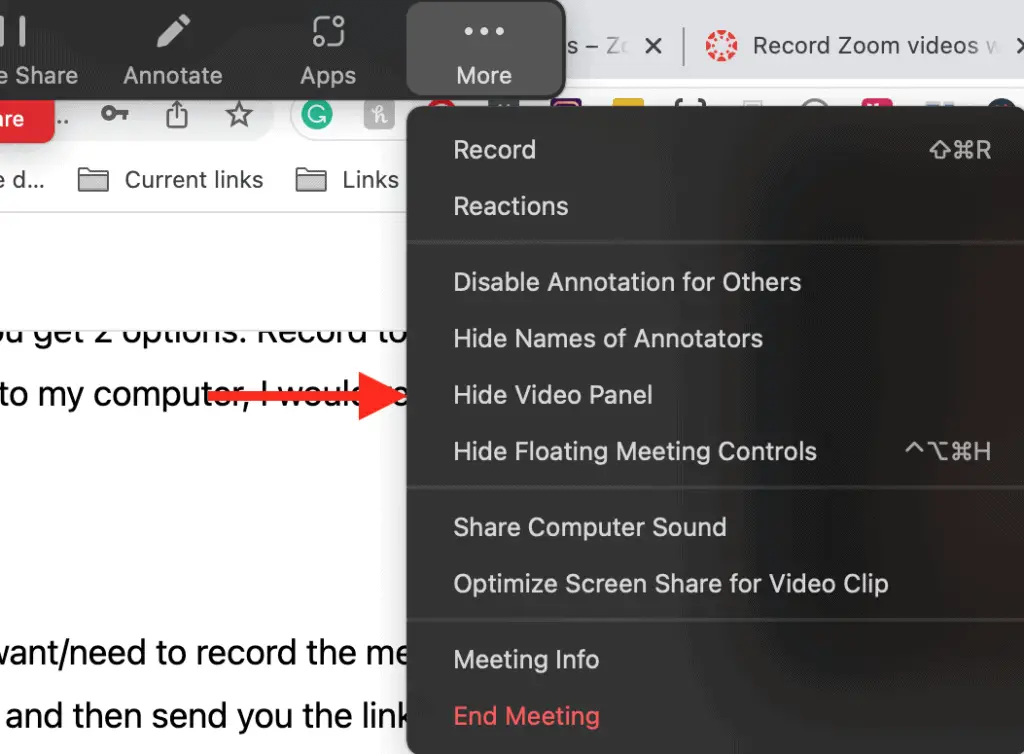
To hide the panel, click “More” on the screen sharing toolbar and select “Hide Video Panel”:
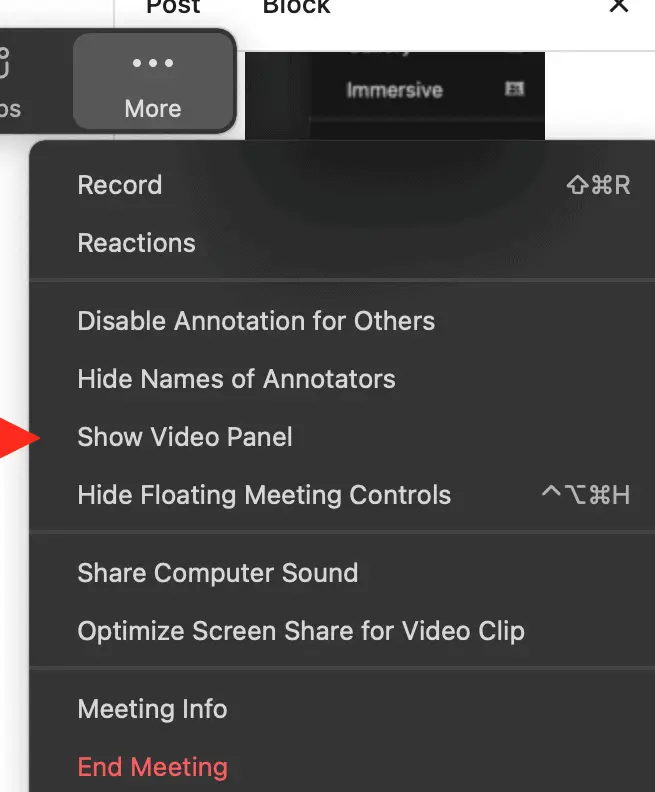
To see the participants again, click “More” on the screen sharing toolbar again, and select “Show Video Panel”:
Can you rearrange Zoom participants?
You can rearrange Zoom participants in Gallery view by clicking and dragging the video thumbnails to where you want them. Participants can also pin up to 9 participants’ video thumbnails which puts only those pinned in the gallery grid with all other participants in the floating thumbnail sidebar.
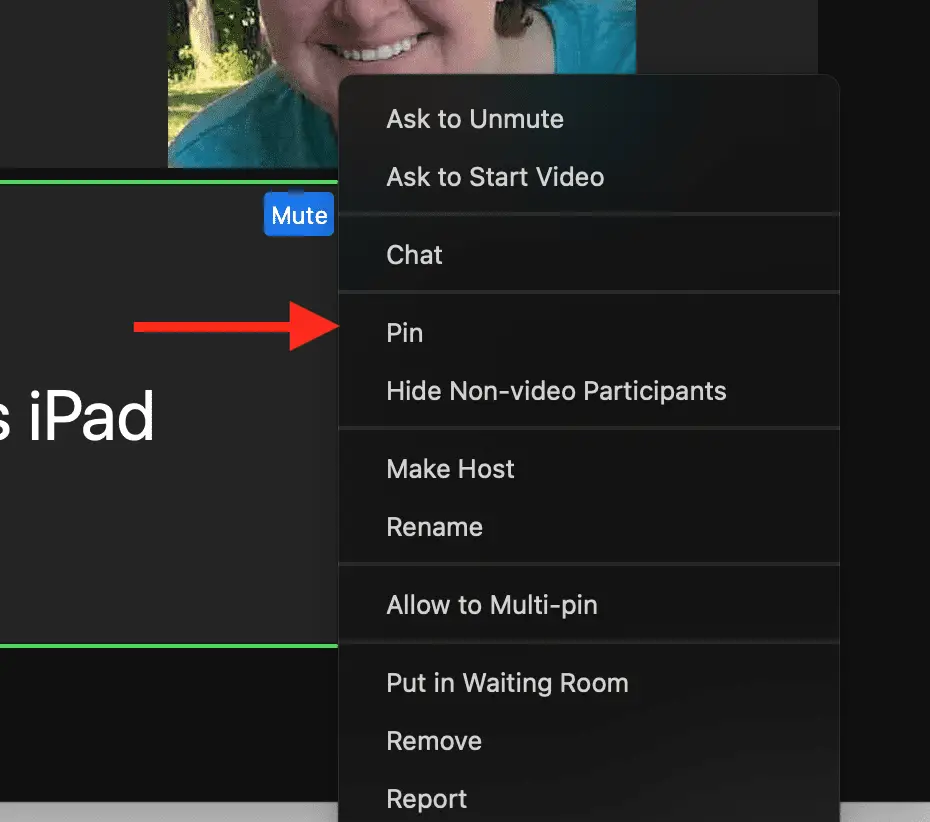
To pin a participant, click on the “More” button at the top right of their thumbnail and select “Pin” from the dropdown list:
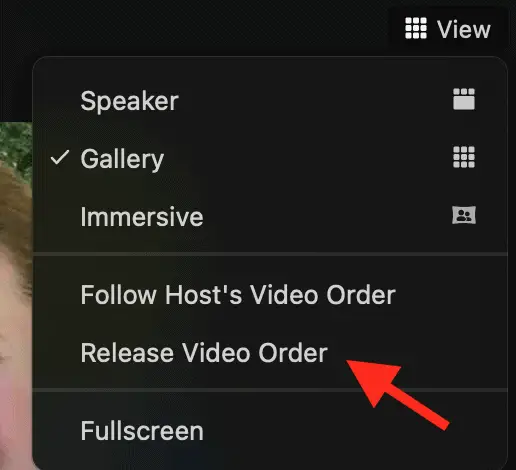
If you drag and drop to rearrange the order of participant thumbnails, you can undo this by clicking on the View button at the top and selecting “Release Video Order”:
Hide participants that have their video off
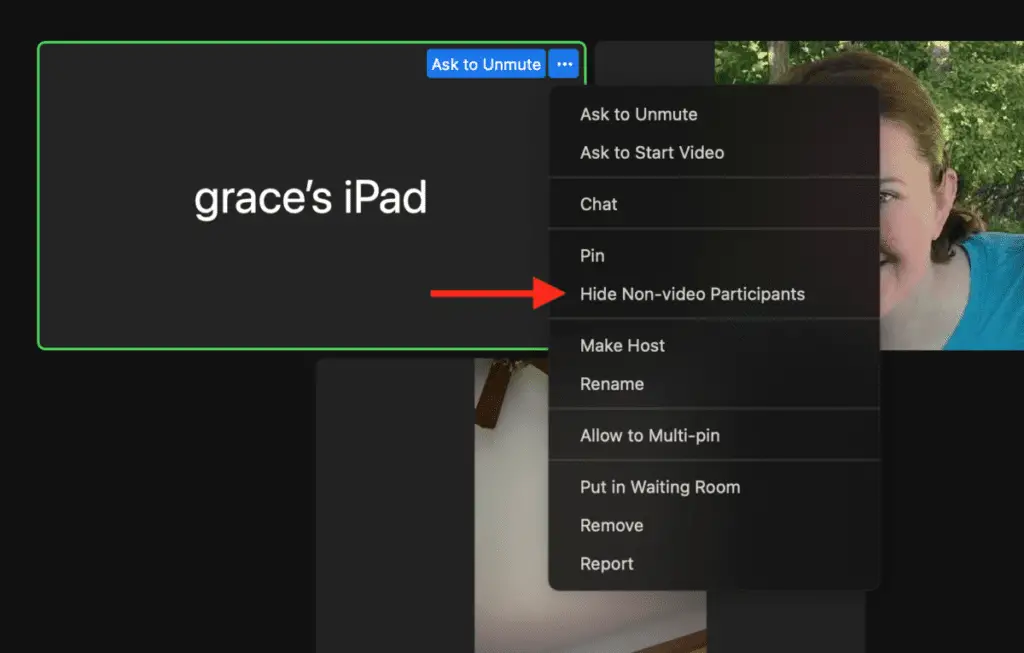
Click on the ellipsis (3 dots) on the thumbnail of any person that has their video off. Then click on the “Hide Non-video Participants”:
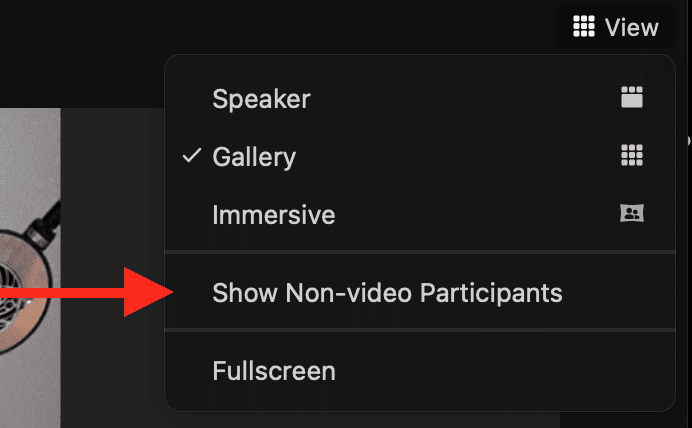
To undo this and see participants with their videos off, click on View at the top right, and click on “Show Non-video Participants”.
Stop all video
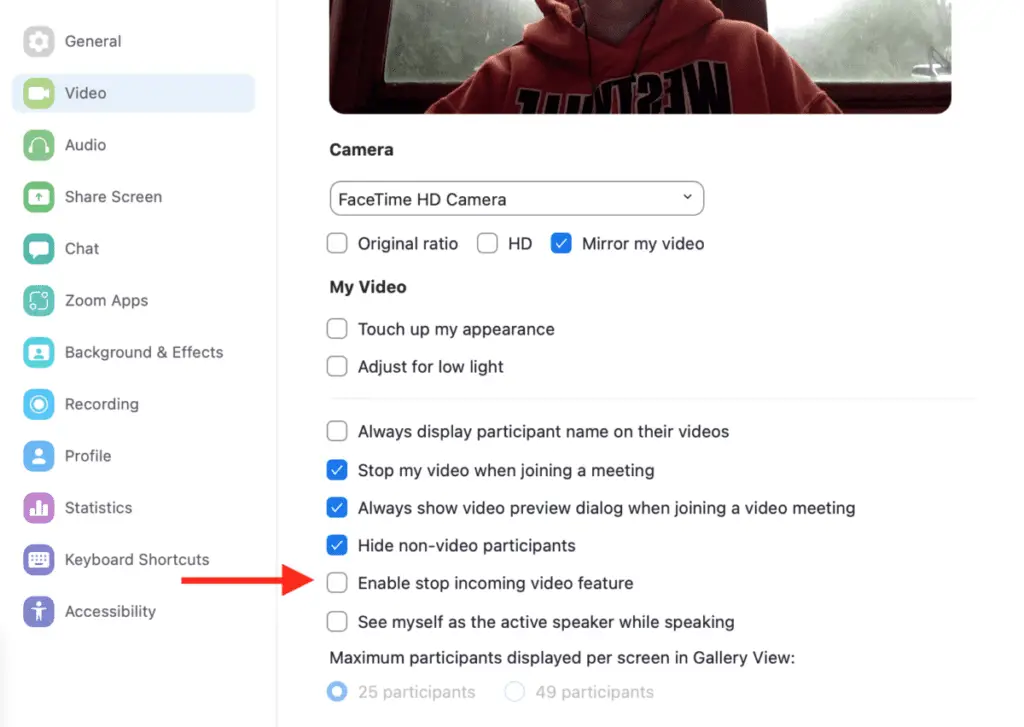
If you don’t want to see anyone’s video, you can change your setting to stop all incoming video.
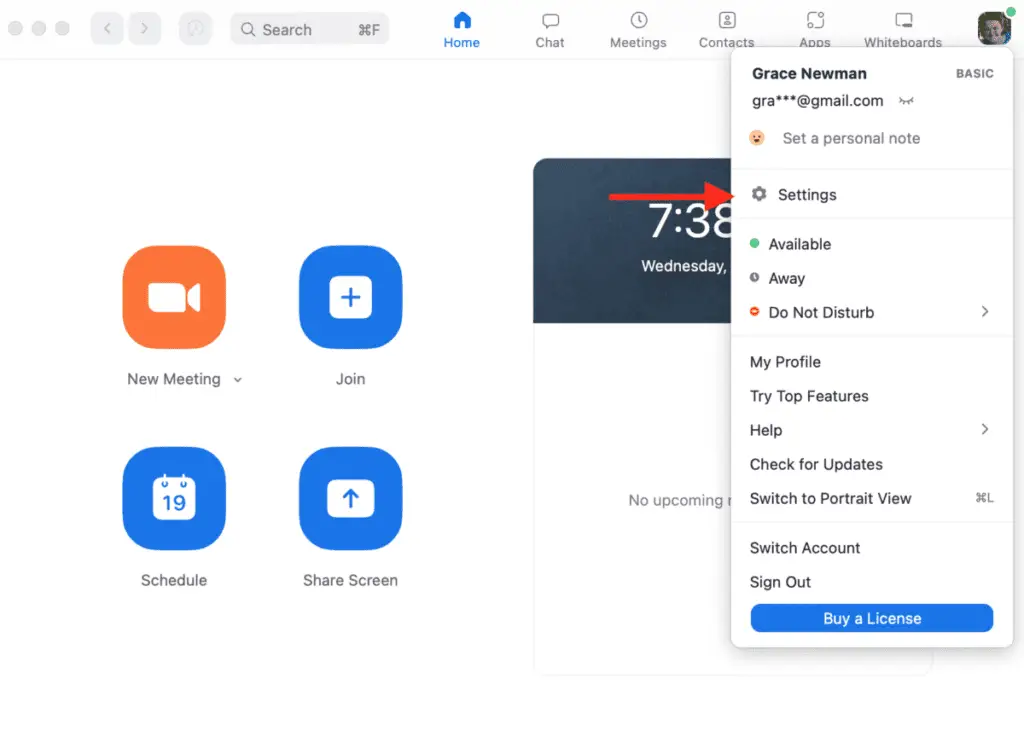
On the dashboard, click on your picture, then select settings:
On the video tab, check the box that says “Enable stop incoming video feature”:
Now that you know how to change the view on Zoom, learn about Zoom: Reactions, Nonverbal Feedback, & Gesture Recognition.
For an overall walk-through of Zoom’s basic features, check out The Basics of How to Use Zoom for Online Classes.
My favorite products for Zoom meetings and classes
Thank you for reading this article—I hope you found it helpful! Here are some of the best products I have found to help make Zoom meetings and classes go smoothly.
Noise-canceling headphones: All students and anyone attending a lot of Zoom meetings need to invest in a good pair of noise-canceling headphones. I have used Bose earphones for over a decade, and I love them! I practically live in my earphones and have tried many different brands. Bose is by far the best brand at actually blocking out noise.
Laptop stand: One of the best ways to look good on video calls is to have the camera at eye level. A laptop stand is an easy and affordable way to do this.
Webcam: If you have a good laptop with a functioning webcam, then you don’t need to buy an additional webcam, but if your laptop webcam is poor quality, you may need to buy a webcam.
Webcam lighting: Another way to look good on video calls is to have good lighting. A great way to achieve this is with lighting that attaches to your computer. This will also ensure that you can be seen no matter where you attend are when you attend the Zoom meeting.
To see all of my most up-to-date recommendations for tools and products for students, check out this resource that I made for you!