Yoast SEO is a plugin that helps you optimize your posts and pages. It is one of my must-have plugins.
I have found a TON of lists of plugins that everyone needs to have, but most of them don’t tell me why I need it. They also don’t show what to do once I install it.
I won’t do that to you. I will tell you why you need it and walk through the settings with you. Let’s begin.
What does Yoast SEO do?
Yoast SEO is a plugin that helps you use SEO (Search Engine Optimization) on your posts and pages.
In other words, it helps make your post easier for Google to find and know what it is about. This gives you a better chance of ranking on Google.
Yoast SEO Settings
First, you will need to install and activate Yoast SEO.
Once that is completed, you will see the Yoast plugin in the left-hand side WordPress Menu:
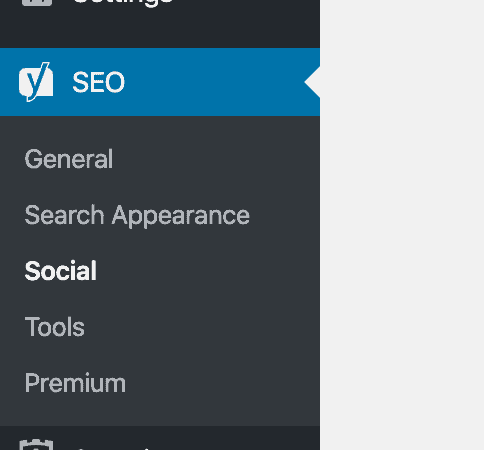
I’m going to go through each tab, but Yoast does a pretty good job with the default settings, so if you only want to go to the portions that you need to change, then go to the subheadings that are bolded, italicized, and underlined (so you cannot miss it!).
General
Dashboard
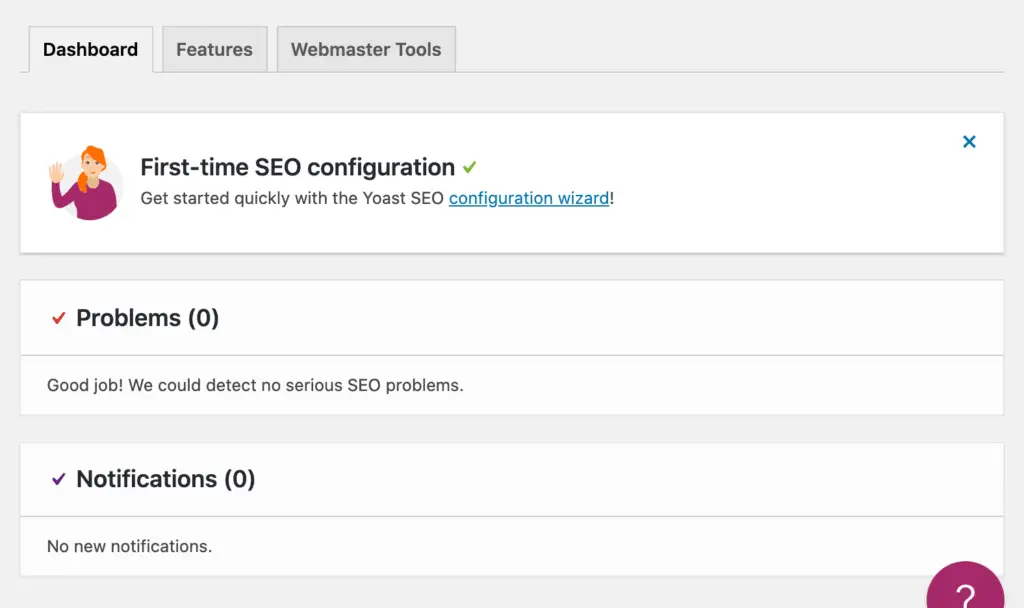
Here you can go through the configuration wizard. This doesn’t take long and is pretty self-explanatory if you want to go through it. However, I don’t think it is necessary because we will go through what it covers as we manually adjust the settings.
Features
You are given the option to turn the features on or off.

I would recommend leaving all the features On to get the most use out of the Yoast plugin.
Here is a quick explanation of what each feature is:
- SEO analysis: Analyzes your content and offers suggestions for things to improve for SEO.
- Readability analysis: Analyzes your content and offers suggestions for things to improve to increase readability.
- Cornerstone content: Let’s you mark certain posts/pages as cornerstone content.
- Text link counter: Shows you the number of internal links to that post and inside that post.
- XML sitemaps: Creates an XML sitemap (and updates it after each new post) to help search engines better understand your site.
- Ryte integration: This checks weekly if your site is indexed and notifies you if it’s not.
- Admin bar menu: Adds a Yoast SEO menu to your WordPress admin bar.
- Security: not advanced settings for authors: Hides advanced settings from other authors.
- REST API: Head endpoint: gives you metadata for a specific URL.
Webmaster Tools
This tab helps you verify your site with the major search engines.
It seems harder than it is. All you do is click the “Get verification code link” for whichever search engine you are trying to verify.

If you don’t already have an account with that search engine, then you will need to make one (it takes only a minute).
Then it will take you to a page like this (they all look pretty much the same regardless of which search engine link you clicked):

Pick the HTML tag option. Copy and paste that into that box on Yoast’s Webmaster Tools verification page and save it.
You can verify with any or all the search engines that you want, but I would recommend that you at least verify with Google.
Search Appearance
General
Title Separator

You can change this if you want, but I would just stick with the default.
Homepage
This is what is shown in search results if people are Googling for your site.

Just leave the SEO title to default and add a Meta description for your site ( a short description of what your site is about).
Knowledge Graph and Schema.org

Here you put whether your site represents an organization or a person. I recommend you select an organization because that is what people would be Googling for more.
If you select “organization,” then you will put the organization’s name and logo.
Content Types
Here you can pick which types of your content (posts and pages) you want to appear in search results and what their default appearance should be.
You will have the same options for posts and pages:

What you see here should be the default. I would recommend you just leave it there.
Two things you want to make sure of:
- You want to make sure Yes is clicked for Show posts (or pages) in search results? (You want your posts to show up on Google!).
- That you don’t set a default meta description because you want each post to have a unique meta description (which you will fill out when editing that post).
You can decide whether you want to show the date or not, but I recommend that you don’t so that a date from farther back doesn’t make readers not want to click on it.
Below that, do the same thing for the pages section.
Media

This section is super simple. It asks, “Redirect attachment URLs to the attachment itself?”.
This means that when you put pictures or videos on your site, WordPress creates an attachment URL for it. If you select No, then each of those separate URLs will be indexed by Google and be able to be shown in search results. You don’t want viewers going to a page with just a photo on it.
You want this set to Yes (which should be the default). Make sure that it is.
Taxonomies
Categories

I would just leave all of this to the default settings.
Make sure that “Show Categories in search results?” is set to Yes. Leave the default meta description blank because you will want each category to have its own description.
Tags
This offers the same options as the categories section, but for tags.
I would recommend that you have “Show Tags in search results?” set to No because most people either don’t use tags (I don’t), or they use them very haphazardly.
Formats
Here you pick to enable or disable format-based archives. I’d select Disabled.
Category URLs
Here you have the option to remove or keep the /category/ prefix on the Category URLs.
Here is an example of one of my Category URLs.

Do not change this to Remove unless you are just starting and don’t have potential links to your Category URL already out there. You don’t want the link not to work, and setting up a redirect for this is silly when keeping it there doesn’t really matter.
Archives
Author archives settings

Keep this Disabled unless your website has several regular authors, and you want someone to be able to find each author on Google.
Date archives settings

This shows archives for a certain period of time on search engines.
I’d recommend that you check Disabled for this.
Special Pages

This shows how search pages and 404 pages appear on search engines.
Just leave the default settings here.
Breadcrumbs
If you want Breadcrumbs, then you can select Enabled.
Be warned: Some themes have problems showing breadcrumbs. If that is the case for you, I would leave it Disabled instead of spending the time trying to fix it—more productive ways to spend time on your site.
RSS
Here you can add content and links to your RSS feed.
This is to protect you from content scraping (when your original content is copied and posted on another website). When you have the extra content added, people who post your content will automatically be linking back to your website.
You want this, so just leave the default:

Social
Accounts
Here you will link to all of your social media accounts.


Facebook settings
It means that you want Facebook and other social media sites to display a preview (images and text) when someone shares a link to your website.
You want this to be set to Enabled.
Frontpage settings
Here you can put what you want to be displayed when someone shares a link to your homepage.
I would recommend that you fill this out. You can put your logo as the image, your website’s name as the Title, and click “Copy home meta description” to use the description that you already filled in earlier in the Search Appearance—General—Homepage section.
Default settings
Here you can set an image that will be used if the post/page that is shared doesn’t have any images.
You can do this if you want, just to be safe, but I don’t think it is necessary. Your posts should have at least one image, and if they don’t, they normally use your logo as the image anyway.

This is similar to the Facebook tab.
You select Enabled to have Twitter show a preview, and you select which kind of preview you want.
I would recommend you just leave the default settings for this.
Here you can confirm your website with Pinterest.
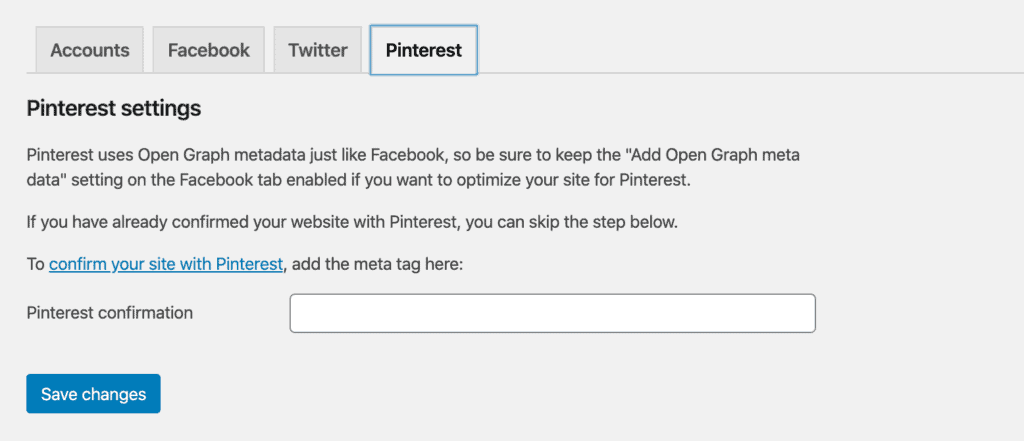
Click the “confirm your site with Pinterest”.
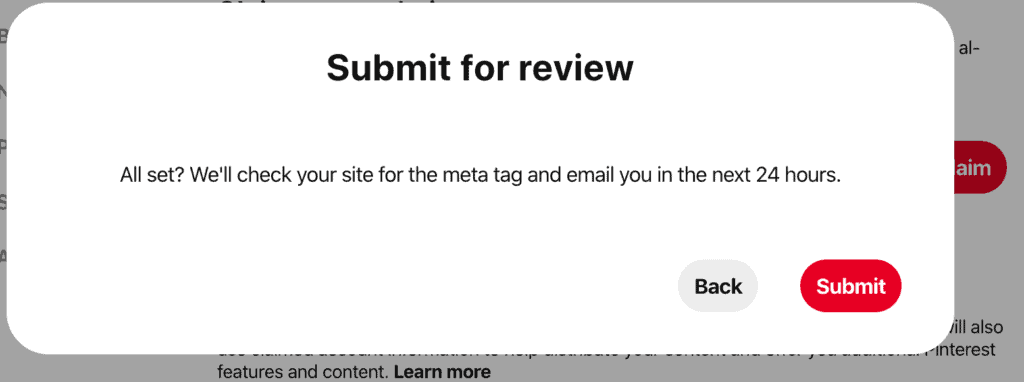
You’ll be taken to Pinterest settings where you will enter your site to claim it and be given a meta tag that you paste into the “Pinterest confirmation” box. Don’t forget to click save!
You will see this from Pinterest:
Tools and Premium
These are the last two sections under the SEO menu on your WordPress sidebar.
Tools have options for Import and Export, Bulk editor, and Text link counter. You don’t need to do anything with these.
You can purchase premium for additional features, but the free version comes with plenty of features that I don’t think you need it.
Now your Yoast plugin is all set up, and you are ready to begin using it. To help you, you can read my follow up post on how to use Yoast SEO.
If you found this post helpful, please share it!


