
I just got a new MacBook, so I know it can be overwhelming to know what to do when you first set up a Mac.
Luckily, while researching and doing this for my Mac, I learned that setting up a MacBook is easier than it seems.
When you first set up a Mac, you should complete the Setup Assistant, check for software updates, sign in to your Apple ID and sync everything to the iCloud, set up your email, download the apps your use regularly, connect to your printer, get a backup system, and customize your display and dock.
Follow these simple steps to get your Mac set up and customized to your liking.
Are you carrying around your laptop? You should get a protective case, laptop backpack
Learn the ports
The ports on your Mac will be different depending on which one you have. Take a moment to become familiar with the ports.
Since all the newer models come with USB-C ports, if you have anything with a USB that you want to plug into your Mac, you will want to get a USB-C to USB Adapter.
Check out all the benefits of Prime Student
Should I charge my Macbook before first use?
When first using and setting up a Macbook, it should be plugged in and charged to ensure that you have battery power while using the Setup Assistant.
Complete Mac Setup Assistant
Have your Wi-Fi password ready, and then turn on your Mac (it may turn on automatically when you open it).
When you turn your new Mac on, the Setup Assistant starts. Apple makes this pretty simple and walks you through it. You can skip some steps or choose to “Set up later.”
Accessibility: Mac has some useful accessibility options. During the setup, to open the accessibility panel, press and hold Option + Command + F5.
You will:
- Select a language
- Select a country
- Select and sign into your Wi-Fi network
- Be asked if you want to transfer any information from a previous Mac, Time Machine backup, or computer. You can select “Not Now” to either not transfer the information at all or to transfer it later. (I would recommend doing it later and using Apple’s guide.)
- Be given the option to Enable Location Services
- Sign in with your Apple ID or set up one if you don’t have an Apple ID (use the same Apple ID for all your Apple devices). They will ask you to verify with another device that is signed in to your Apple ID.
- Agree to the terms and conditions
- Create an account name and password for your laptop. You will be given the option to add a hint for your password and to Allow your Apple ID to reset this password.
- Set your time zone or check the box to set time zone based on your current location (this requires that you enabled location services)
- Be asked if you want to Turn on FileVault disk encryption (encrypt your Mac’s drive). You can check a box to allow your iCloud account to unlock the disk.
- Decide if you want to store files in iCloud.
- Enable Siri or not.
- Set up Apple Pay if you want to.
- Set up Screen Time to monitor and get reports on how you are using your computer
- Choose an appearance: Light, Dark, or Auto
- Set up Touch ID (if your Mac has this)
At any point during this or at the end, you may see a spinning wheel, and it may take some time to finalize the settings, which is normal.
Check for software updates
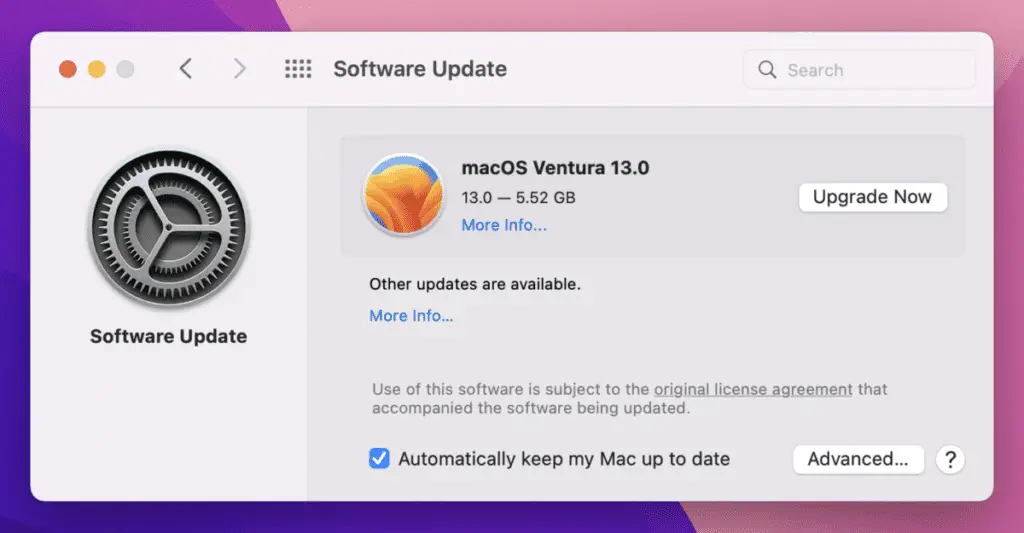
After you go through the Setup Assitant, check for software updates. Depending on the software on there, you can do this by clicking on the Apple icon in the top left-hand corner and then clicking System Preferences > Software Update OR clicking General > Software Update.
Update your software.
You can also check “Automatically keep my Mac up to date.”
Store files in the iCloud
To store your files in iCloud and sync between devices, go to Apple icon > System Preferences (or System Settings) > Apple ID > iCloud.
Make sure that iCloud Drive is turned on and that the apps syncing to iCloud include Desktop and Documents folders.
Check that everything synced
After you sign in to your Apple ID and turn on iCloud sync, make sure that your files, notes, reminders, photos, and music sync (though, remember that this can take a little bit).
Set up your email accounts in the Mail app
Add each of your email accounts in the Mail app so that your emails are all conveniently in one place.
Explore already installed app
Check out the apps that are already installed.
Download any apps you use
What you need on a new Mac depends on what apps and programs you use. Start by adding the apps and programs that you routinely use.
My required apps are:
- Google Chrome
- Zoom
- Grammarly
- Goodnotes
Go to Safari and download whichever apps you use.
When you download Google Chrome, you will be asked to Set Google Chrome as your default browser:
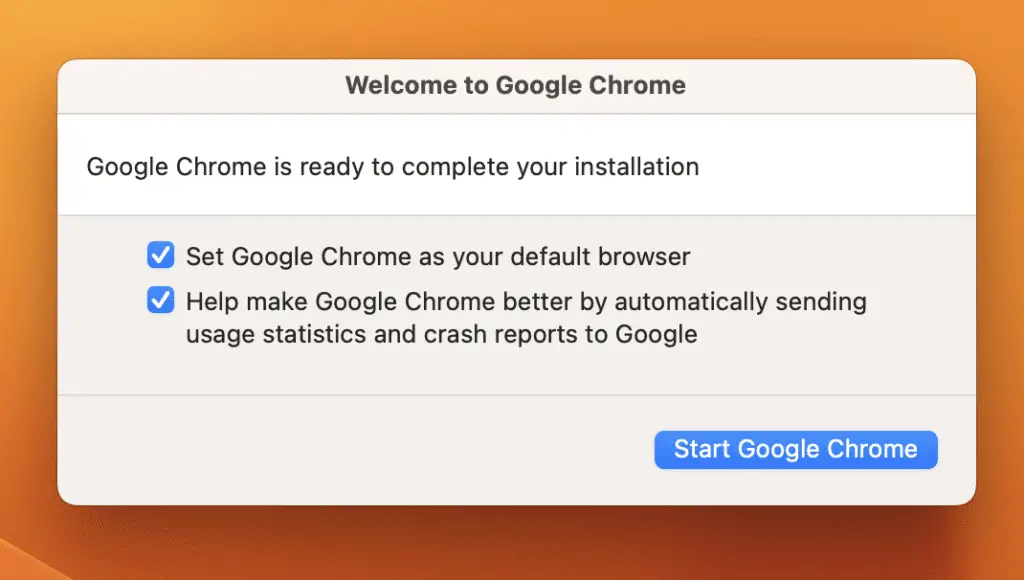
Then sign into your Chrome account(s). Sync your bookmarks and make sure that your auto-filled passwords are still there (or get your password extension, such as LastPass).
Customize the Dock
Now that you know what apps are already there and have downloaded the ones that you use, you can customize your dock.
Click on any app > Options > then click either “Keep in Dock” or “Remove from Dock.”
Customize display
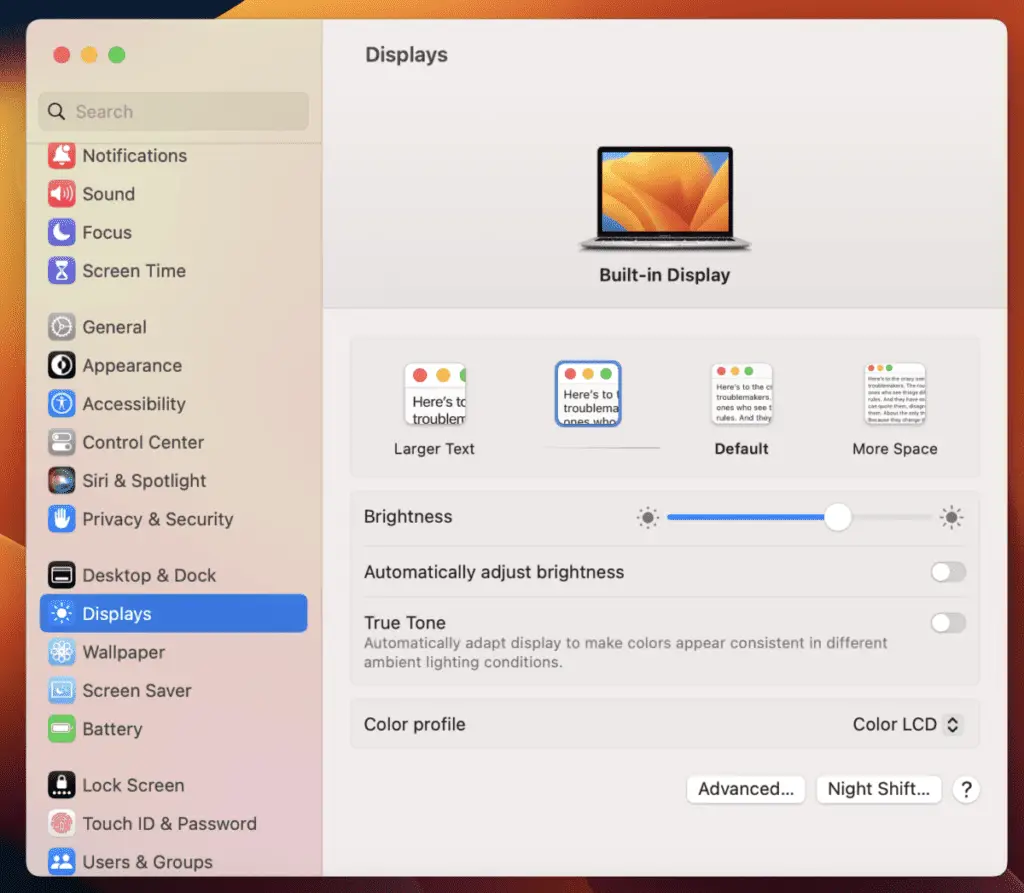
Take some time to customize your display. Click the Apple icon > System Settings > Displays.
You can change how large the text is and the brightness.
Customize trackpad
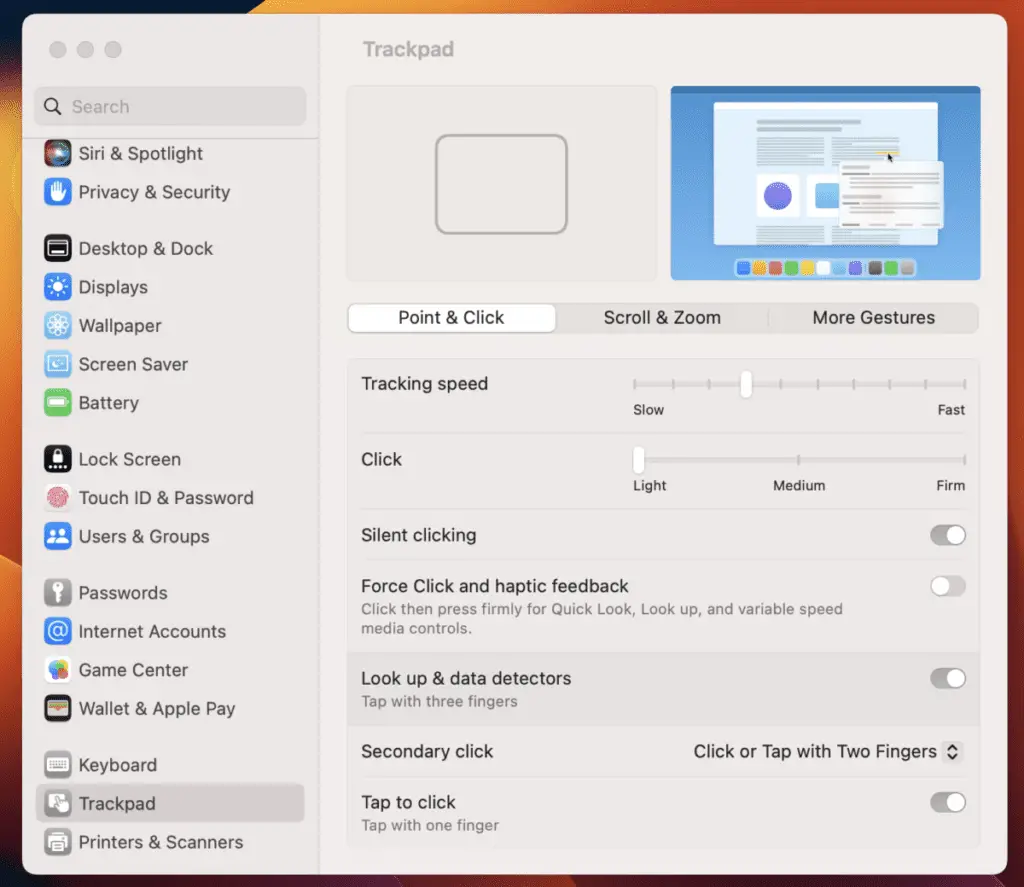
Click the Apple icon > System Settings (or System Preferences) > Trackpad.
You can customize the speed of the trackpad (I like it as the default).
You can also enable Silent clicking, Tap to click, and secondary click with Two Fingers (all of which I highly recommend).
The Tap to click, in particular, is helpful since it allows you to simply tap the touchpad instead of having to push it down (more like how you would tap on a phone or tablet). It has the added benefit of being silent.
Enable three-finger drag
Three-finger drag allows you to drag something using three fingers instead of needing to click and drag. This is a feature that I wish I had known about earlier!
Apple makes this hard to find. You need to click on the Apple icon > System Settings (or System Preferences) > Accessibility > Pointer Control > Trackpad Options.
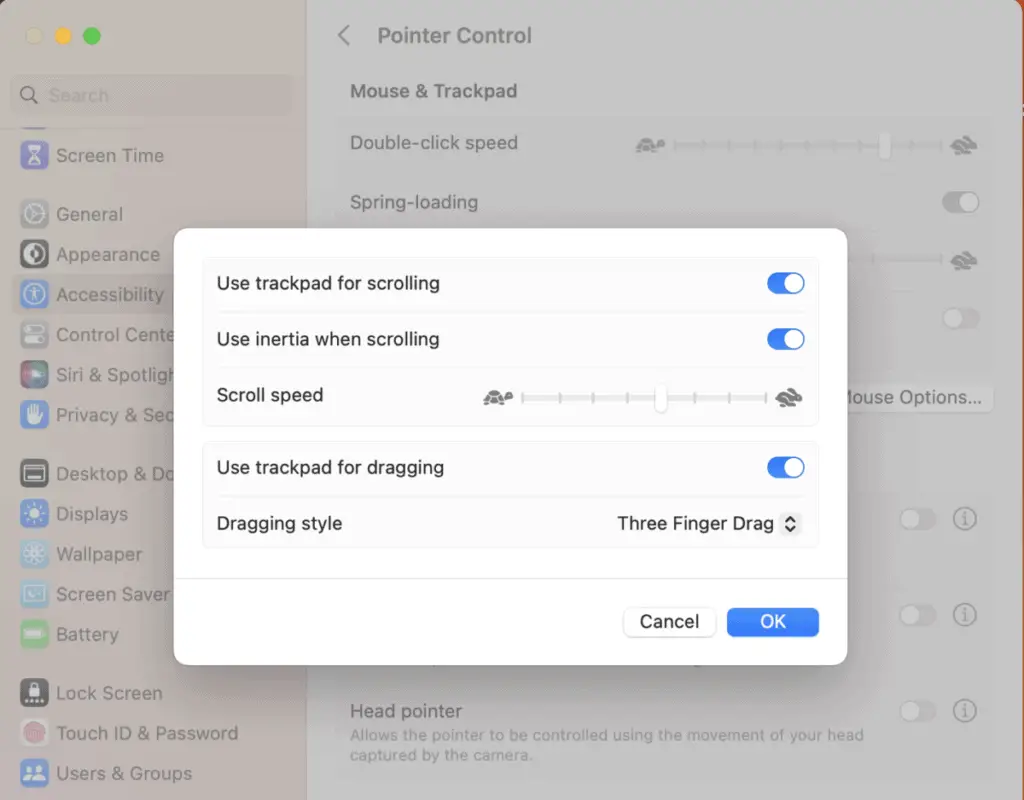
Click “Use trackpad for dragging” and select “Three Finger Drag” from the dropdown list under “Dragging style.”
Connect to printer
To connect your new Mac to your printer, click on the Apple icon in the top left > System Settings (or System Preferences) > Printers & Scanners.
It should recognize your device, or you can click to Add Printer (on System Preferences, you click the + sign).
Change wallpaper
To change your wallpaper, click on the Apple icon > System Settings > Wallpaper. Then pick whichever one you like best or add your own photo.
Get a backup system
Take it from someone that lost all of her files (over a decade worth of photos, videos, etc…)—you need a backup!!
An easy way to do it is to get an external drive (I use and always recommend Seagate) and use Time Machine to back up your entire Mac.
Check out Apple’s article on how to use Time Machine.
Add another Touch ID
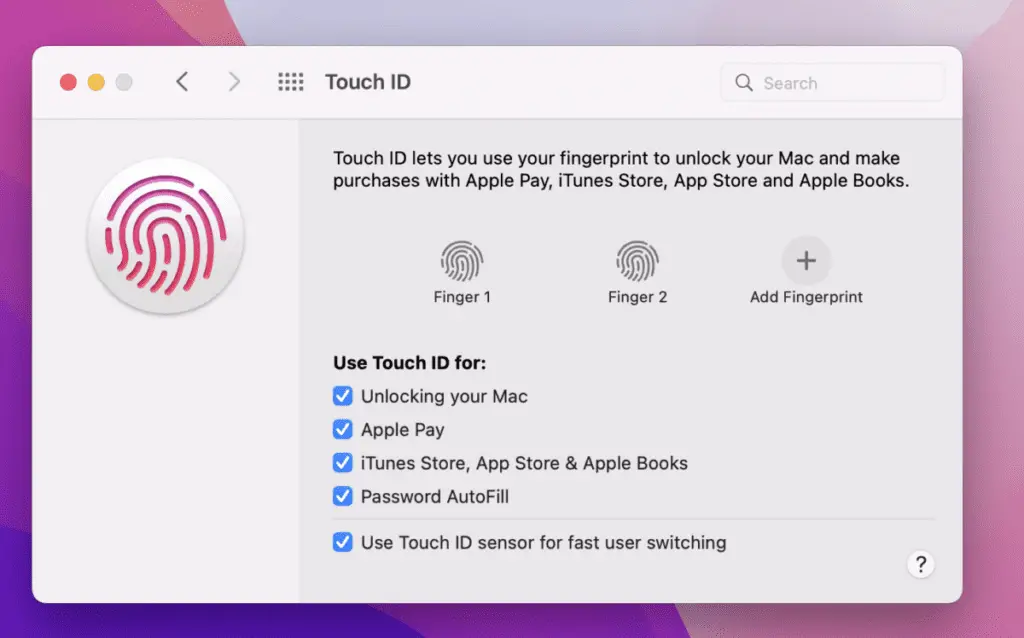
If your Mac has a Touch ID, you probably added one fingerprint to Touch ID during the Setup Assitant, but take the time to add a second Touch ID from your other hand so that you can unlock it with both hands.
You can also decide how you want to be able to use it:
- Unlocking your Mac
- Apple Pay
- iTunes Store, App Store & Apple Books
- Password AutoFill
Check whichever you want to be able to use Touch ID for.
Show battery percentage
To show battery percentage in the top menu, click the Apple icon > System Settings (or System Preferences) > Control Center. Underneath Battery, click “Show Percentage.”
Disable floating screenshot thumbnail
If you take a lot of screenshots and don’t like the floating thumbnail that appears after you take a screenshot, it is super easy to turn this off.
Press Command + Shift + 5
Then click on “Options” and unclick the “Show Floating Thumbnail.”
Set up screen time and Do not disturb
In System Settings, you will see the option Focus—this is where you can set do not disturb times.
Below that is Screen Time. Here you can monitor how you use your time on your device(s) and set app limits. I use this to limit how much time I can spend on Netflix, Hulu, etc…
Enable/disable Siri
This should be an option during the Setup Assitant, but if you didn’t set this up or want to change it, you can go to the Apple icon > System Preferences (or System Settings) > Siri.
Then click or unclick “Enable Ask Siri” to turn this on or off.
Learn MacBook tips for beginners
Let’s look at three useful tips to do on your Mac.
Split view
You can use a Split View on your Mac by:
- Having two apps or windows open and not in full screen
- Hover your pointer over the green maximize button in the top left-hand corner
- From the list of options that appears, select Tile Window to Left of Screen or Tile Window to Right of Screen
- Select the second app or window that you want on the other side
Take a screenshot
Take a screenshot by pressing Shift + Command + 4 and dragging the cursor over the area you want to take a screenshot of.
Force quit
If you are having trouble with an app, you force quit by clicking on the Apple icon > Force Quit > and then selecting the app you want to force quit.
Check out Apple’s user guide or essential book for your Mac
Check out Apple’s User Guides or Essentials book for your device to learn all about your Mac.
If you have problems, get help

Click the Help option at the top menu. Start typing what you need help with, or click on macOS Help.
You can also check Apple support or call Apple customer service at (800) MY–APPLE (800–692–7753).
Now you know how to set up your Mac. Learn more about How To Take Care of Your MacBook (Making It Last Longer).
My favorite products for your laptop
Thank you for reading this article—I hope you found it helpful! Here are some of my favorite products for your laptop that I hope you’ll also find helpful.
External drive: Back up your laptop with an external drive. I have used Seagate drives for many years, and their drives are great quality, and their customer support is very helpful!
Lap desk: Lap desks make it easier to use your laptop anywhere, including your couch or bed.
Cleaning brush for electronics: Use a brush to clean electronics to keep your laptop clean.
Travelings case and/or bag: A protective laptop case is a hard case that keeps your laptop safe when you are carrying it or traveling with it. Another way to carry around your laptop is with a laptop backpack or over-the-shoulder laptop bag. Use one (or even better, both) to protect your laptop when on the go.
To see all of my most up-to-date recommendations for tools and products for students, check out this resource that I made for you!